
Part of our job here at RocketNews24 is to demystify Japan. It’s not that we are trying to make it seem less special, but we would like to turn it from a land of social and cultural barriers into the participatory place our team loves and calls home.
Today we’ll be covering how to tie the sash (or obi) on a man’s yukata summer kimono. Yukata is a look you can rock at festivals, fireworks shows, or just about any entertainment venue during the warmest months of the year. Despite the tradition involved, putting on a yukata isn’t really any harder than tying a necktie (and if you haven’t mastered that yet, you really should have your dad teach you before you go off to college).
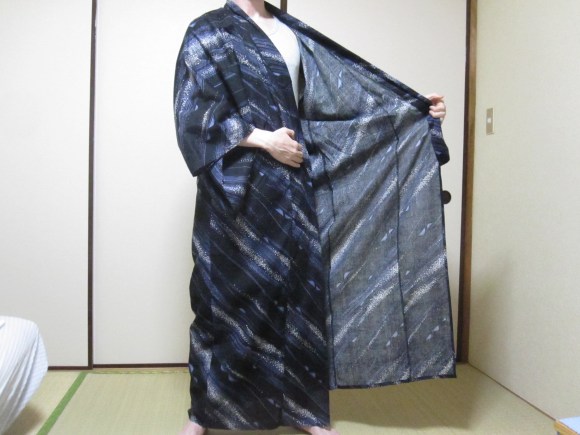
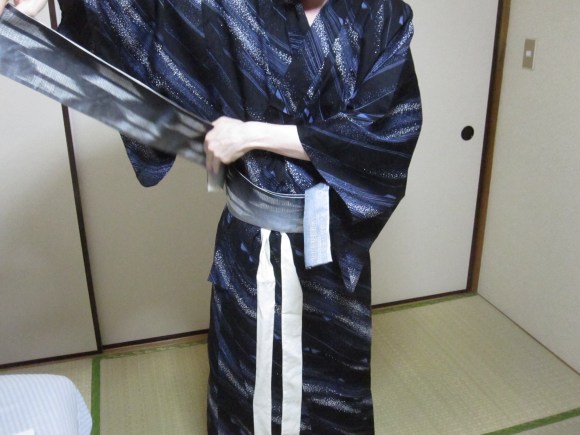
First, fold the robe around yourself. You want a large overlap, with the front right edge stretching to your left hip, and vice-versa. Make sure the left flap is in front of the right (just like a man’s button-up shirt), since putting the right over the left is how corpses are wrapped before cremation.
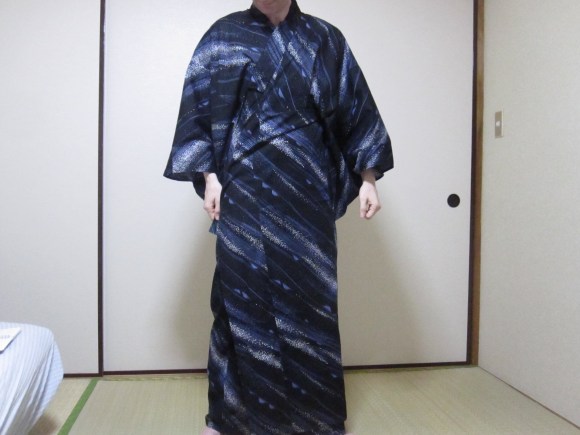
To keep everything in place, take any thin strip of cloth (yukata sold in more upscale department stores usually come bundled with them) and tie it around your waist. A slipknot is fine since we’re going to be removing this later. You can even use a regular belt in a pinch, or skip this step entirely once you get used to tying the obi.
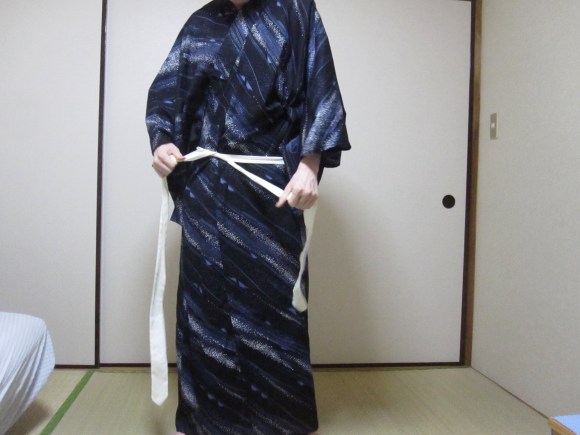
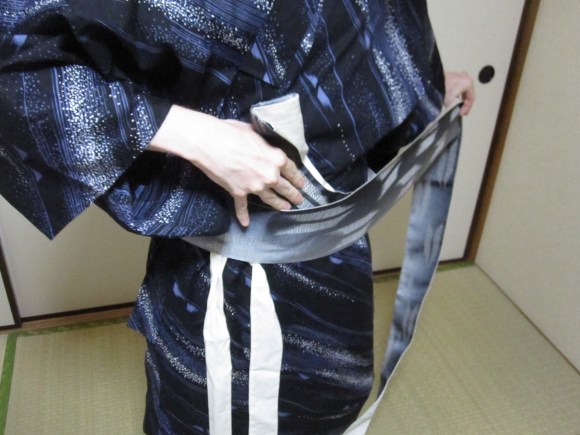
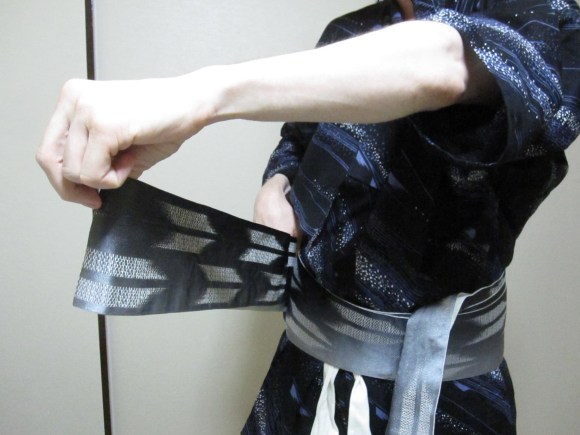
Now we’re ready to get down to business. Take the end of the obi and crease a section of it a little longer than the length of your hand.
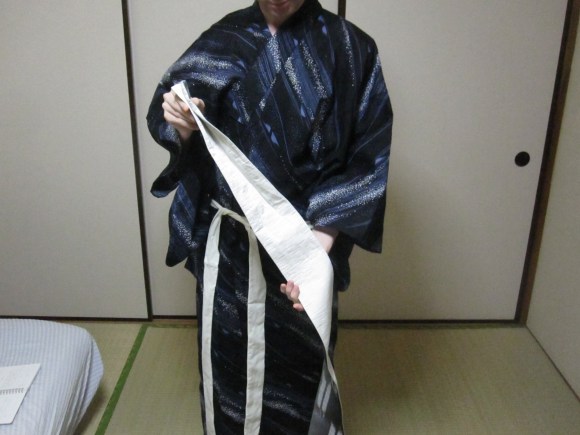
Place this creased section in front of you, with the open edge facing left.

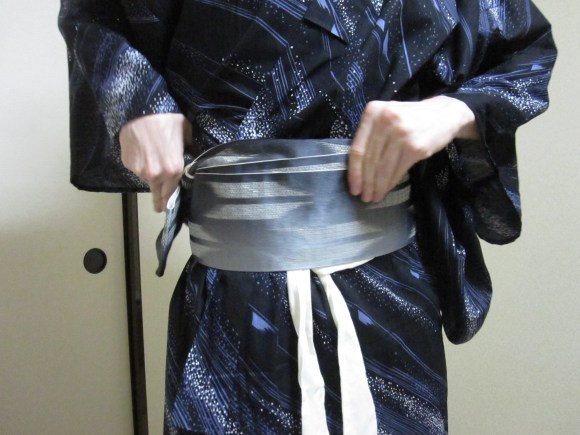
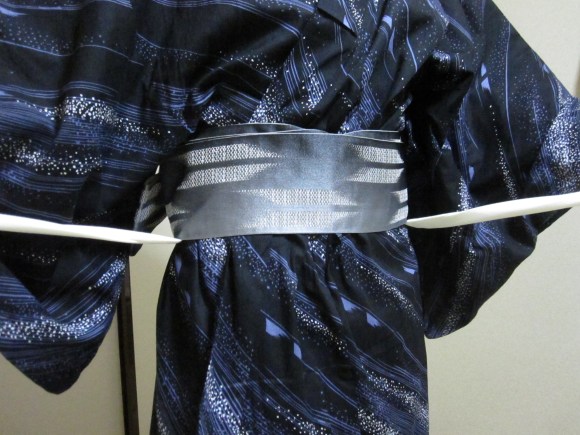
Now, wrap the rest of the obi snugly around yourself, going past your left hip and behind your back. The ideal height is with the upper edge hitting near the bottom of your navel, not high on the hips.
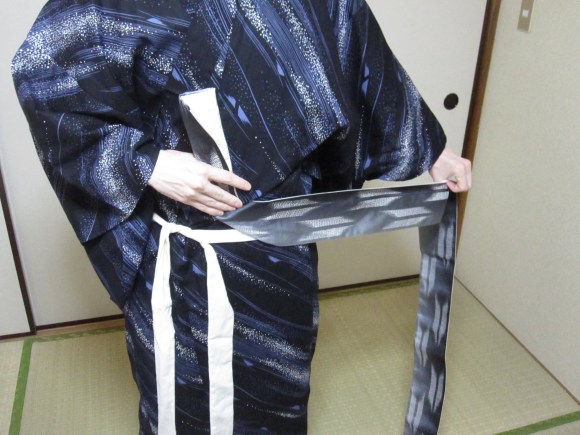
You should have enough material to make two trips around. Once you get to your right hip for the second time, stop.
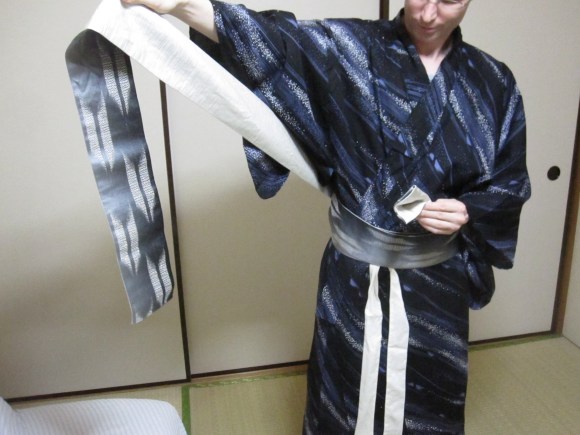
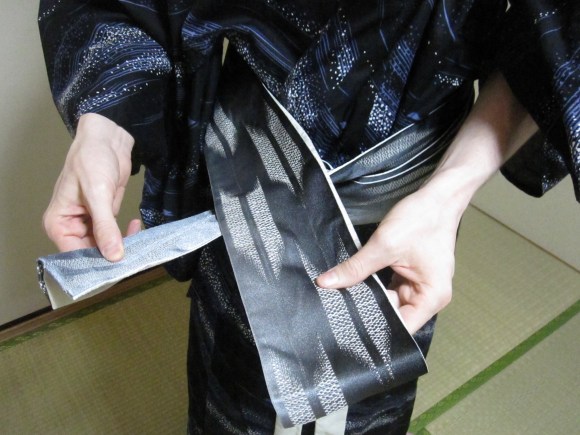
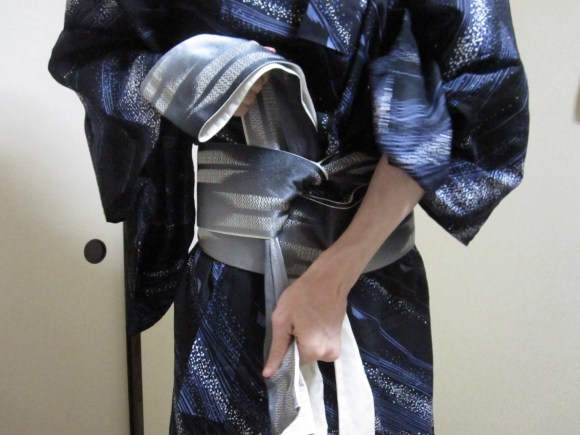
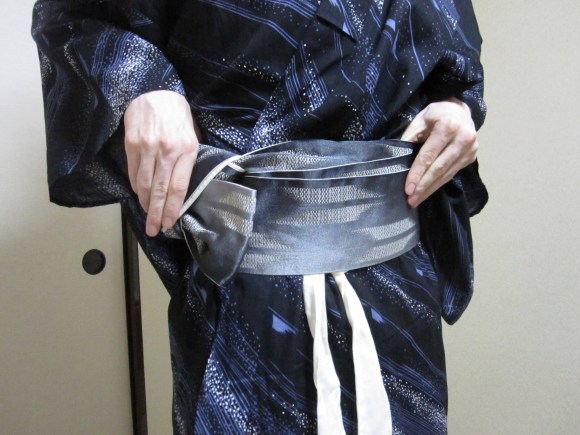
Now, take the remaining length of the obi and fold it back along itself.
At this point, you should have two flaps sticking out from the obi, the creased, half-width one from when you started wrapping it around yourself, and the full-width one you just formed.
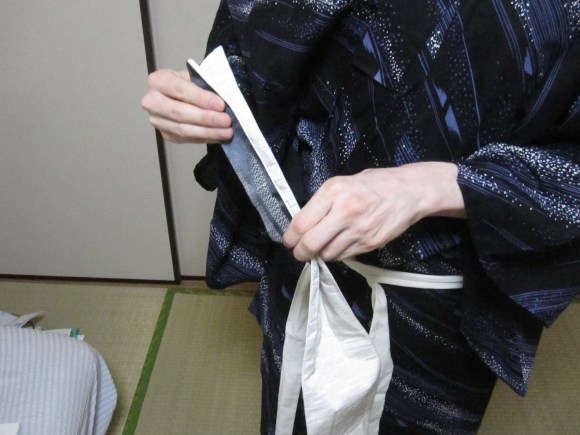
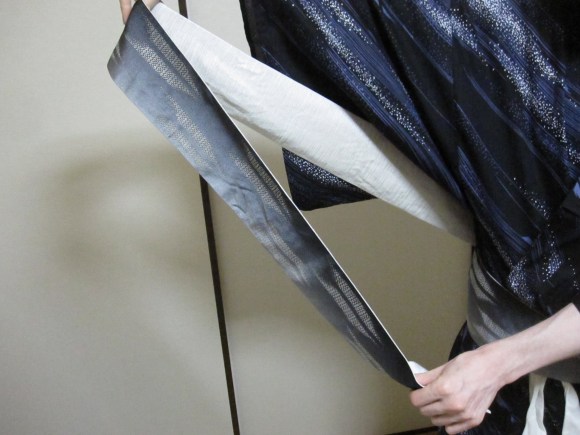
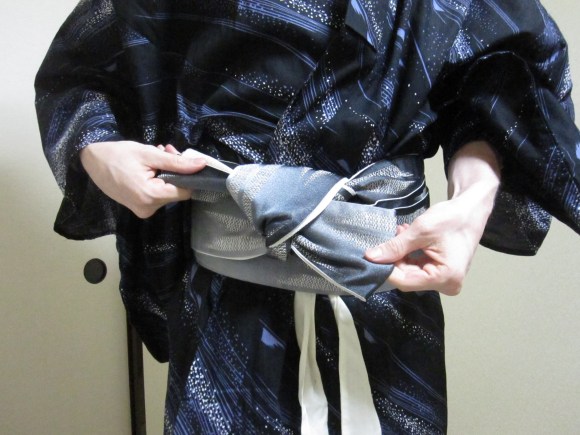
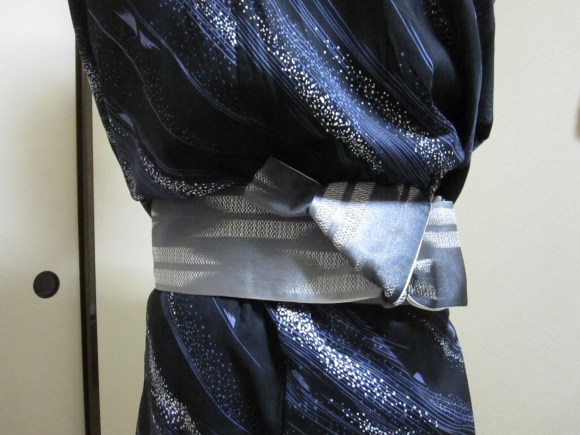
Now we’re ready to tie the knot. Place the wide flap over the narrow one, and tie a slipknot. You should end up with the wide flap pointing up, and the narrow flap pointing down.
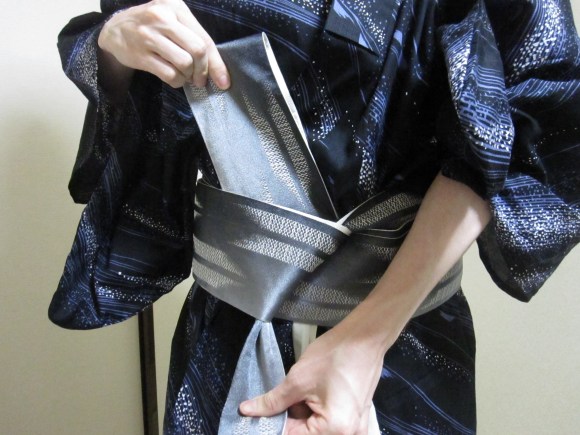
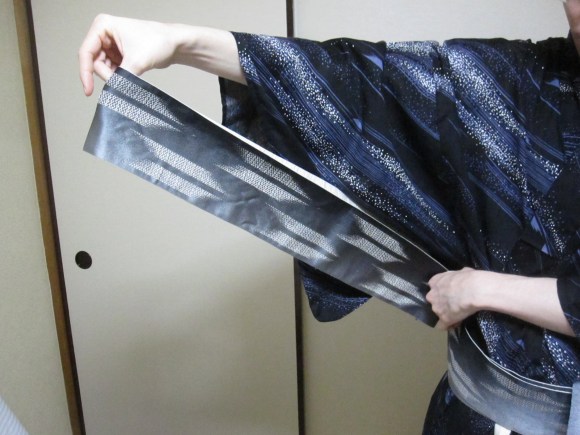
Fold the wide flap forward, back down onto itself.
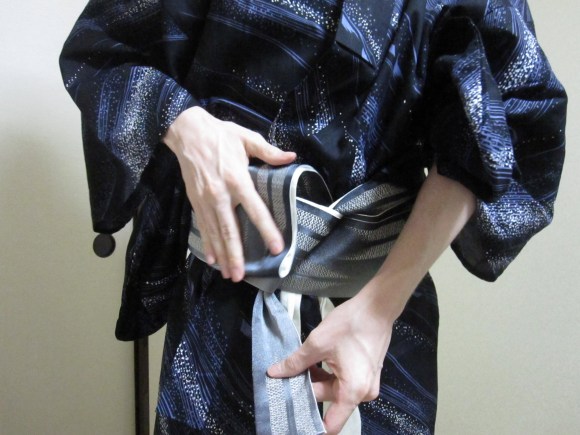
And finally, draw the narrow flap through the center of the fold you just made, pulling each flap firmly to close the knot.
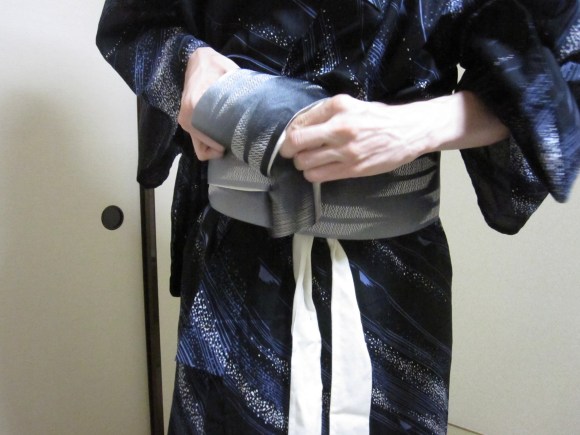
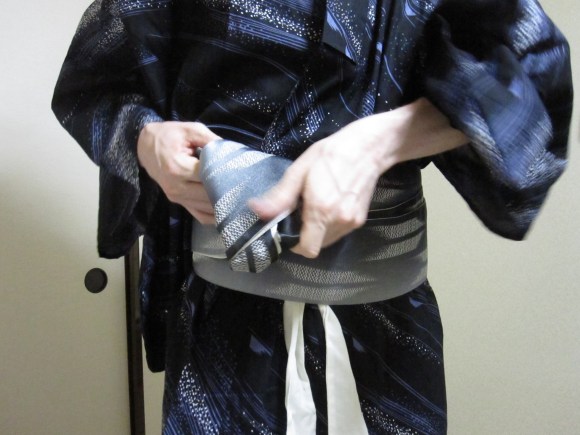
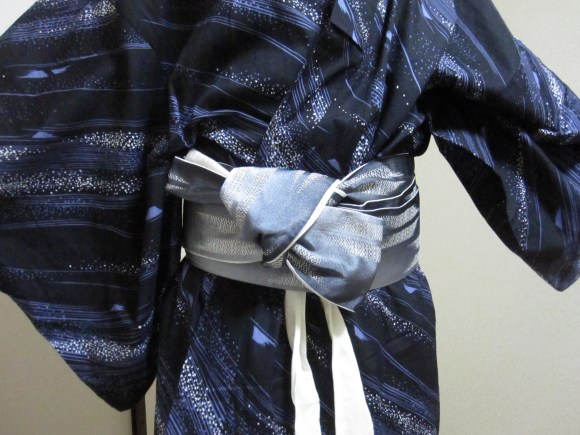
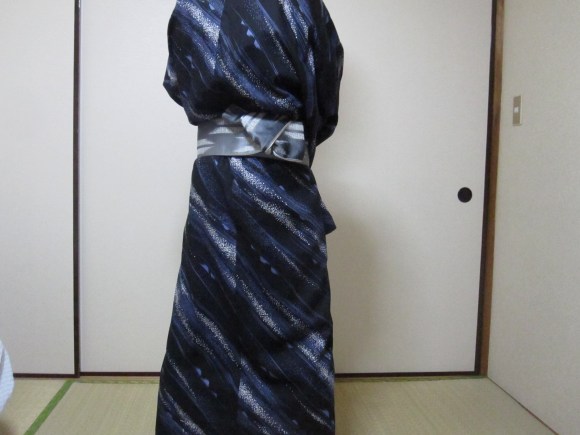
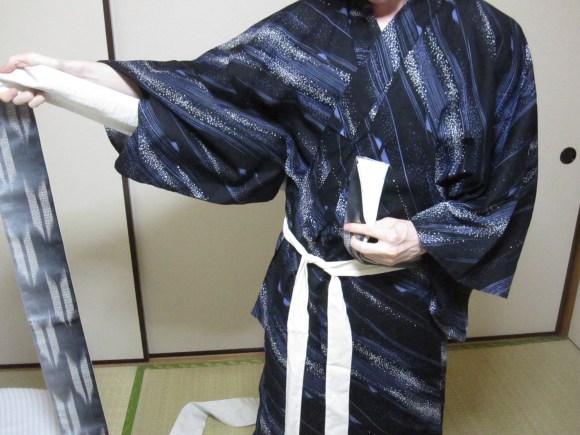
Smooth out any unwanted folds or wrinkles, then rotate the knot to your back, moving from your left to your right to keep from pushing the front flap of the robe open.
Don’t worry about getting the knot right in the middle of your back, as having it slightly off-center is considered the most fashionable look.
Take one last second to make sure the various layers of the obi all line up nicely, pull out the strip of cloth you initially held the robe in place with, and you’re good to go.
Fully dressed, you will now notice the true phenomena of yukata: it’s almost impossible to walk without strutting while wearing one. Feeling like equal parts samurai and Shaft, you’re now all set to enjoy a Japanese summer to the fullest.
Photos: RocketNews24
 Cat kimonos from Japan will help keep you cool and cute this summer【Photos】
 Make a cute and simple origami chopstick rest with nothing but the wrapper they come in 【Video】
 Ariel and Jasmine star in Disney princess pseudo-kimono line from Japanese fashion brand【Photos】
 Experience your own “miracle romance” in one of these Sailor Moon summer kimono sets
 Zippered pouches made from candy bags are the latest creative DIY craze on Twitter
 McDonald’s new Happy Meals offer up cute and practical Sanrio lifestyle goods
 All-you-can-drink Starbucks and amazing views part of Tokyo’s new 170 meter-high sky lounge
 More foreign tourists than ever before in history visited Japan last month
 Starbucks reopens at Shibuya Scramble Crossing with new look and design concept
 Beautiful Sailor Moon manhole cover coasters being given out for free by Tokyo tourist center
 The oldest tunnel in Japan is believed to be haunted, and strange things happen when we go there
 Arrest proves a common Japanese saying about apologies and police
 Mister Donut ready to make hojicha dreams come true in latest collab with Kyoto tea merchant
 Our reporter takes her 71-year-old mother to a visual kei concert for the first time
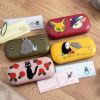 Studio Ghibli glasses cases let anime characters keep an eye on your spectacles
 Disney princesses get official manga makeovers for Manga Princess Cafe opening in Tokyo
 We try out “Chan Ramen”, an underground type of ramen popular in the ramen community
 Beautiful new Final Fantasy T-shirt collection on the way from Uniqlo【Photos】
 Foreign English teachers in Japan pick their favorite Japanese-language phrases【Survey】
 Is the new Shinkansen Train Desk ticket worth it?
 There’s a park inside Japan where you can also see Japan inside the park
 Japanese convenience store packs a whole bento into an onigiri rice ball
 Studio Ghibli releases Kiki’s Delivery Service chocolate cake pouches in Japan
 Japan’s bone-breaking and record-breaking roller coaster is permanently shutting down
 New definition of “Japanese whiskey” goes into effect to prevent fakes from fooling overseas buyers
 Foreign passenger shoves conductor on one of the last full runs for Japan’s Thunderbird train
 Our Japanese reporter visits Costco in the U.S., finds super American and very Japanese things
 Kyoto bans tourists from geisha alleys in Gion, with fines for those who don’t follow rules
 Studio Ghibli unveils Mother’s Day gift set that captures the love in My Neighbour Totoro
 Domino’s Japan now sells…pizza ears?
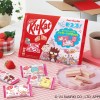 New Japanese KitKat flavour stars Sanrio characters, including Hello Kitty
 Sales of Japan’s most convenient train ticket/shopping payment cards suspended indefinitely
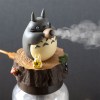 Sold-out Studio Ghibli desktop humidifiers are back so Totoro can help you through the dry season
 Japanese government to make first change to romanization spelling rules since the 1950s
 Ghibli founders Toshio Suzuki and Hayao Miyazaki contribute to Japanese whisky Totoro label design
 Doraemon found buried at sea as scene from 1993 anime becomes real life【Photos】
 Tokyo’s most famous Starbucks is closed
 One Piece characters’ nationalities revealed, but fans have mixed opinions
 We asked a Uniqlo employee what four things we should buy and their suggestions didn’t disappoint
 Princesses, fruits, and blacksmiths: Study reveals the 30 most unusual family names in Japan
 Studio Ghibli’s new desktop Howl’s Moving Castle will take your stationery on an adventure
 Rugby World Cup 2019: Team Canada jumps off bus in yukata kimono…dressed like the dead
 Yukata summer kimono separates allow you to mix and match traditional outfits with everyday wear
 Kimono genius turns obi sash into the head of Evangelion Unit-01【Photos】
 New panda hats and earmuffs from ACDC Rag will keep you warm, increase your kawaii points by ten
 Never work with animals: Outtakes from Japanese delivery company’s adorable black cat ad【Video】
 Virtual reality game will let you turn kimono-clad girls into spinning, battling tops【Video】
 We can’t stop watching this cute cat put together a packing box【Video】
 Japanese Twitter user shares a genius-level tip for drawing manga characters in skirts【Pics】
 The ultimate pajamas for lazy otaku girls are now on sale in Japan 【Photos】
 The Japanese art of making trash containers from old papers
 Kimono to keep, dressing service, unlimited beer, one of Japan’s best views all in one package
 How not to bathe at a public bathing facility in Japan
 New My Neighbor Totoro fashion bags and wallets save best surprise for what’s on the inside【Pics】
 Busty or boobless? Japanese Twitter debates which makes for more beautiful kimono anime art
 Fashion rental service Rcawaii now offering kimono rentals, special campaign underway
Leave a Reply